Develop
If you want to make changes to SUAVE source, or contribute new functionalities back to the community, this is the page for you!
Background
SUAVE is developed via GitHub, and this page will describe how to get started. There is also a list of open topics available for contribution if you’re looking for ideas to get started.
As a developer, you’ll want to fork SUAVE to your personal account. This creates a copy of the whole SUAVE repository, including all past versions, inside your GitHub account. Generally you’ll want to start from the develop branch, but you can check with the developers if you think it would be more appropriate to work on a feature branch.
Development is done on separate branches. Our branching model is very similar to this one. Basically there are three types of branches.
- master – stable, latest release and fixes
- develop – current development, generally the branch for you to start with
- feature-* – feature specific branches, using names with underscores, check with the developer email list if you think this a better place to contribute
SUAVE merges new code contributions through pull requests. As you make changes to your copy of SUAVE, you’ll upload them to your GitHub fork, and then when they’re ready for review you’ll submit them for merge via pull request.
Style Guide
SUAVE is built on a slightly modified PEP8 style guide, with changes made to implement a data-oriented view of the code. To help support discovering code, the SUAVE folder structure explicitly mirrors the package structure. Flexibility of the package structure is important, so in general all objects live in their own file, with the same file name as the object name. In order to maintain a separation between Analysis and Data structures, there are often parallel package trees inside the main branches of the package, like SUAVE.Methods.Aerodynamics and SUAVE.Analysis.Aerodynamics. Where possible the names of fields that live in the SUAVE package are written out verbosely, avoiding jargon built on mathematical variable names or acronyms.
A full description of the style of SUAVE can be found on the Guides page.
Templates for new methods and objects can be found in the SUAVE repo’s templates folder.
Prerequisites
In addition to the package dependencies listed on the download page, you will need to install git.
Git-Client
Git is an advanced distributed version control system. It is the core of the majority of current open source projects. Here are some instructions for installing git on your machine.
linux , mac , windows , more info
There are several GUI’s available to help manage the repository. On Windows TortoiseGit is a useful one.
If you’re going to install TortoiseGit on windows, when installing the git client (MsysGit), uncheck “Windows Explorer Integration”. And when installing TortoiseGit, select “Checkout as-is, Unix-style line endings”
Once you’ve installed git, there a few post-install commands to run, documented here.
GitHub Account
GitHub is a hosting service for git projects. SUAVE’s repository is located here.
If you don’t have a github account already, go ahead and sign up!
Then, go to the SUAVE github repo at github.com/suavecode/SUAVE and check out the code! If you wouldn’t mind, tick the “Watch” and “Star” buttons at the top-right of the page, if you think this is a useful repo.
Developer Installation
Time to pull code. If you had previously installed a release distribution according to the download page, you’ll want to uninstall the existing package first.
- Go to the SUAVE github repo.
- To get your own copy of the source, with links into real-time updates, you need to
 the repo. This button is on the top-right of the page too.
 - This will copy the repo and take you to your fork, notice that your web-browser’s URL has changed to include your username.
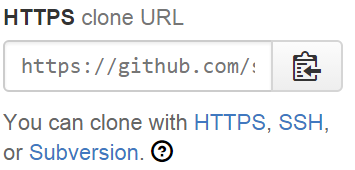
- Now you can clone your fork to your computer. Find the clone url of your fork on the right hand side of the page and copy it. You can use the https url.
- Open a command prompt, in a directory that you want to start the repository (for example in the SUAVE_Project folder), and run the git clone command
git clone <git url>
Now you should have the source code. - Change directory into the trunk folder and run a developer installation command.
python3 setup.py develop
Now you have a developer version of SUAVE installed! You can make changes to the source in this directory and the changes will appear the next time you run python, without having to rebuild or reinstall. - Test the installation by changing to any other directory, then start a python shell, and run the command
>>> import SUAVE>>> print(SUAVE.__file__)
This should print the file path to the SUAVE package init.py file in your trunk directory.
Some Notes
- You may need to run a sudo (super user do) command to install SUAVE when working on linux or mac systems:
sudo python3 setup.py develop - The same strategies for dealing with write access can be used here, by simply replacing any
installkeywords withdevelop - To uninstall the developer version, run the command
python3 setup.py develop --uninstall
Managing your repository
As you make changes to your code, you’ll want to add and commit them to your clone, and push them to your fork. You’ll fetch changes from the upstream remote (the suavecode repository), and merge them into your clone. To send your changes back to the upstream repository, you can submit a pull-request.
Setting the upstream
Below is a summary of setting the upstream remote. There are a good references for this process here and here, and more via a google search for “git update fork”.
- Inspect your current “remote”, this is the url of the repository to which your clone listens.
In the directory for the cloned repo, type
git remote –vand it should show the “origin” directory for “fetch” and “push”. These are the remote urls for your own fork. - Add an upstream remote to the main suavecode/SUAVE repository using
git remote add upstream https://github.com/suavecode/SUAVE.git - Run
git remote -vagain to see the new remotes. - Finally, download the code for the upstream remote with
git fetch upstream.
Changing branches
You should work on the develop branch in general, it will have the most updated changes from the community.
- Inspect your branches with
git branch -a. You’ll see all the branches, for both upstream and origin. Generally you should only work off the origin branches - Start a new branch with
git branch develop origin/develop. This comand aliases the branch “origin/develop” with the name “develop”. - Checkout the branch,
git checkout develop. - You can see your current branch with,
git branch, the one you have checked out will have a star next to it. - Commit all your changes to the current branch before checking out another branch, otherwise the changes will be lost.
- To dump any changes that you don’t want,
git stash, will be helpful.
Store changes to your GitHub fork
- Edit the code as you need on your machine
- Inspect git’s view of the changes you’ve made with
git status. This shows what files are new, changed and not yet part of the repo’s history. - Add the changed files to your commit with
git add <path to file>, or to add all the changes withgit add -a(be careful with this one). The add command does not make the changes part of your repo’s history! You can do multiple add commands for example. - Commit them to the history on your machine with
git commit -m 'your message for the commit'
Make sure to include a nice description. This command only affects your local repository! You can do multiple commits before sending them to the cloud. - Push the new commits to GitHub with
git push origin. This will send all the commits to your fork on GitHub. This serves as a backup copy for you, and is needed to share the changes with the upstream suavecode repository via pull-requests.
Get new changes from upstream
In this example the upstream/develop branch is merged into the fork/develop branch.
- Checkout your local develp branch with
git checkout develop. - Fetch updates from the upstream repository with
git fetch upstream. - Merge the changes from the upstream into your fork with
git merge upstream/develop. - Push these changes to your fork on GitHub,
git push origin master.
Share your changes with upstream
This creates a nice documentation of the changes that were made. More detail on pull requests can be found here.
- Commit and push all your changes to your fork on GitHub.
- Open a browser and navigate to your branch on the GitHub website.
- Click the “Compare and Review” button.
- Review the changes for any unexpected differences.
- Click the “Create Pull Request” button.
- The devs will take a look and merge the request.
Background on Git
Git is an open source program for tracking changes in text files. It was written by the author of the Linux operating system, and is the core technology that GitHub, the social and user interface, is built on top of it.
The term version control is used in Git and other such programs, and refers exactly to what it reads. It allows a group of software developers (the group may comprise one, many or “more than many”) to keep track of changes being made to the software’s code (i.e., versions of code) and have control on the changes (“versions”). This control helps the programmer(s) to decide
- Which versions should remain
- Which versions need higher priority to fix any bugs or problems
- Which versions are ready to be shipped out to customers (“ready for primetime”)
- Which versions can be put on the sidelines since they are a brainchild of a super whiz programmer who is simply playing with some cool ideas
- Which versions are now obsolete since there are alternate and better software/code available to do the same job (these versions are usually nixed!)
- Which versions are too new and require a lot of related work to be done before they can even be brought up for discussions at the weekly meetings
- And so on
Bottom line is that the concept of version control is mainly to help software development by not losing one’s grip on reality and the primary objectives of the software being developed!
For those interested in learning more about how version control systems (VCSs) such as Git work, refer to
- http://git-scm.com/
- http://git-scm.com/video/what-is-git
- http://git-scm.com/book/en/v2/Getting-Started-Git-Basics
In addition to Git, there are other popular VCSs such as SVN (http://tortoisesvn.net/ and https://subversion.apache.org/), with their own sets of pros and cons. However, Git was chosen for SUAVE because SUAVE developers felt it can be easily implemented on Linux, Mac and Windows, and offers them a lot of flexibility and control in terms of developing and maintaining multiple parallel versions (“branches”) with each providing further parallelization (“forks”). For more information about the concepts of branching and forking, refer to http://nvie.com/posts/a-successful-git-branching-model/
Areas of Development
Short Term Feature Development
These are the areas that are under development or suggested for development are available in our Github projects tab. There are two active projects that include feature development. One is the list of items we plan to accomplish for our next release. The other is a general feature development project, which contains features that we would like to have but are not currently priorities for the next release.
Post to the forum if you’re intersted in working on any of these, or to suggest a new module!
Long Term Development Goals
Looking farther into the future, we have some key items envisioned for the next major release of SUAVE. So far these are:
- Integration with a standardized parameter storage interface such as CPACS
We’re always happy to hear feedback on what our users think is important in this kind of tool, so if you have another idea go ahead and ask about it on our forum.
Back to Top!